

Read the first chapter
The whole of chapter one, free. About 9 min. Turn the pages with the arrows, your keyboard, or a swipe.
Chapter 1
Reading the Ground: How to spot, preserve, and measure animal tracks in mud, sand, or snow.
Copyright
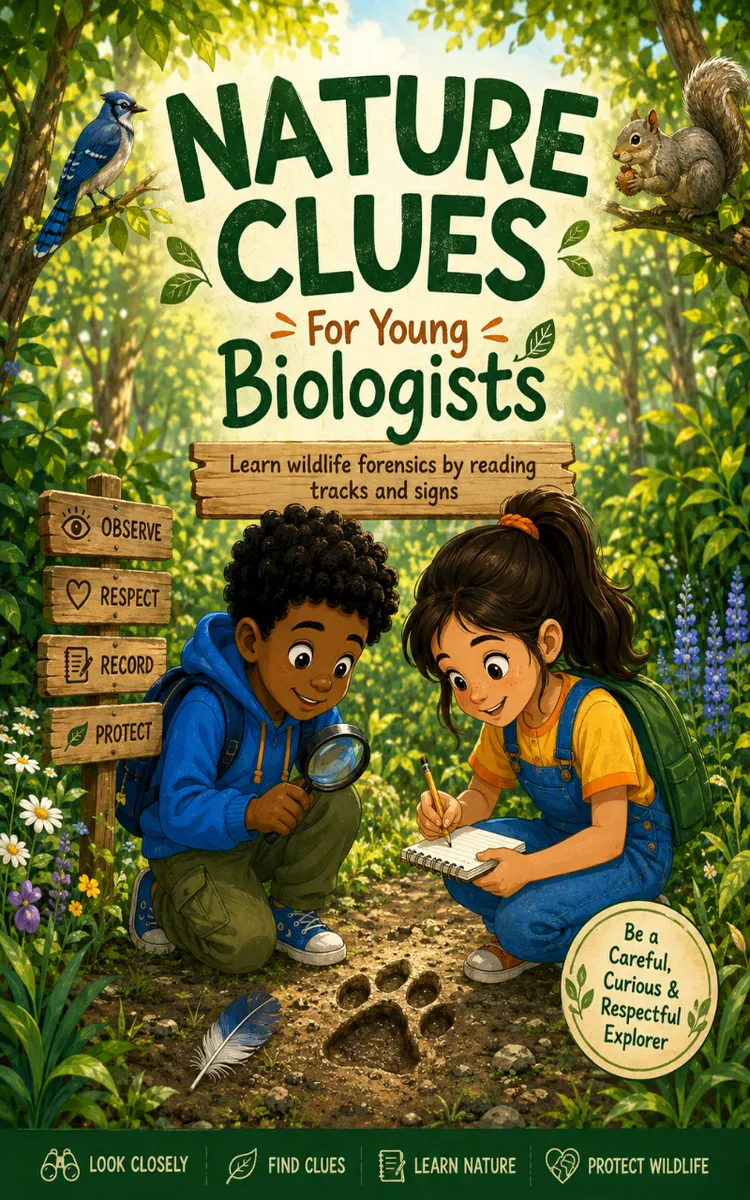
Nature Clues for Young Biologists
Discover Tracks, Feeding Signs, Animal Homes & Wildlife Clues
Copyright © 2026 Sadia Naveed
All rights reserved.
No part of this book may be reproduced, stored, or transmitted in any form or by any means without written permission from the copyright holder, except for brief quotations used in reviews or educational commentary.
This book is intended for educational purposes. Children should explore outdoors with appropriate adult guidance and follow local park rules, land-access rules, and wildlife-safety guidelines.
The observations and activities in this book are designed to encourage careful, respectful study of animals and their surroundings. They are not intended to encourage children to approach, handle, feed, chase, or disturb wildlife.
Written by: Sadia Naveed
Designed by: Sadia Naveed
Edition 2026
How To Use This Book
Welcome, Young Biologist!
The forest is full of clues.
A footprint in soft mud.
A shell with tiny tooth marks.
A hole beneath a fallen branch.
A feather caught in the grass.
Each one tells part of a story.
You don't need to be an expert to begin. You need curiosity, patience, and careful eyes.
This book teaches you to look closely at the world around you and notice details that most people miss. You will investigate tracks, feeding signs, animal homes, and other clues that help explain what animals have been doing. You will learn how to record what you find so others can check your work.
Being a young biologist means observing before guessing, writing down what you see, and giving animals the space they need. Always follow local rules and go outside with an adult when you need one. Keep your hands clean, stay safe around roads and water, and never disturb nests, dens, or animals you meet.
Take your notebook. Slow down. Look carefully.
Your next nature clue may be waiting just outside your door.
Ready? Let's explore. 🔎🌿
Chapter 1
Reading the Ground: How to Spot Animal Tracks
A single footprint can tell you more than “an animal walked here.” Its shape, size, and position can show the animal’s direction, speed, and sometimes the kind of animal that made it. Mud, sand, and snow act like nature’s recording surfaces, but the record can vanish after rain, wind, sun, or another animal passes through.
Start by scanning the ground from a distance. Look for a line of repeated marks rather than one isolated print. A trackway - the path made by several footprints - helps you separate an animal’s real tracks from dents made by falling branches, shoes, bicycle tires, or dripping water. Follow the marks with your eyes before stepping closer. Your own boots can destroy the evidence you want to study.
Choose a place where the surface holds a clear edge. Firm mud often shows toes and heel pads. Damp sand may show the full outline of a paw or hoof. Fresh snow can reveal toes, claws, and the space between prints. Very wet mud may slump after the animal leaves, while dry sand may crumble into a soft blur. Ask yourself: Can I see a sharp outline, and does the same shape appear more than once? If the answer is yes, you have a useful clue.
Before touching anything, check the surroundings. Look for hazards such as thin ice, steep banks, thorny plants, stinging insects, and animal droppings. Keep a safe distance from wild animals, nests, and dens. Never follow tracks onto a road or across unsafe ice. Wear shoes that protect your feet, and wash your hands after fieldwork, especially if you handle muddy tools or visit places where animals gather.
Bring a small field kit so you can record the track without damaging it:
• Measuring tape or ruler
• Pencil and waterproof notebook
• Phone or camera
• Compass, if available
• Small sticks for marking the edge without touching the print
• Cardboard or a flat board for shielding a track from light rain or falling snow
• Plaster casting supplies only when an adult approves and the ground will not suffer damage
Take a photograph before you measure. Place the ruler beside the track, not across it, so the outline remains visible. Include a direction marker, such as an arrow pointing north or a note showing which way the animal traveled. Take one close photograph and another wider photograph that shows the trackway. A close picture shows details; a wide picture shows the pattern.
Write down the date, time, place, weather, and surface. Note whether the ground feels wet, firm, loose, frozen, or crusted. These details matter because the same animal can leave very different marks on different surfaces. A paw pressed into soft mud may look wide and deep, while the same paw on hard snow may leave only a shallow shape.
Preserve the scene before you collect anything. Do not place your hand, ruler, or notebook inside the print. Set tools beside it. If rain threatens, photograph the track immediately and cover it with a simple shelter that does not touch the ground surface. A piece of cardboard held above the print can reduce damage from falling drops, but never press it into the mud or snow. In strong sunlight, work quickly because melting snow can erase small details.
Look for changes inside the track. A clear toe mark may point in the travel direction, but do not trust one feature alone. Compare several prints. If every print points the same way, you can make a stronger judgment. Notice whether the animal walked, trotted, or ran. Walking often creates a steady line of prints. Faster movement may stretch the spaces between marks, and the feet may land in a more narrow line.
Ask yourself three questions before naming the animal: What parts of the foot can I see? How many toes appear? Does the track pattern repeat? A dog, fox, and some other four-footed animals can leave similar paw prints, so one mark rarely proves an exact species. Record what you know and what you are still unsure about. “Four toes, visible claw points, oval pad, moving toward the creek” gives better evidence than “probably a fox.”
Your first job at a track site is simple: protect the print, photograph it, and describe it before guessing. Once the evidence stays safe, careful measurements can turn a muddy mark into useful information.
Measure Animal Tracks in Mud
Mud can preserve excellent tracks, but it can also change shape quickly. Start with the track that looks clearest and measure it before the sun dries the surface. Place the ruler beside the print. Measure length from the front edge of the longest toe or hoof mark to the back edge of the heel or rear pad. Measure width from the widest point on the left side to the widest point on the right side. Record both measurements in the same unit, such as centimeters.
Do not push the ruler into the mud. Pressing near the track can make the walls collapse. If the edge looks fragile, hold the ruler slightly above the ground and use a pencil to mark the numbers in your notebook. Measure at least three clear prints from the same trackway. One print may have slipped, sunk deeper, or landed on a stone. Several measurements help you notice the animal’s usual size instead of one unusual mark.
A trackway gives you more information than a single footprint. Measure the distance from the back of one print to the back of the next print in the direction of travel. This distance is the stride length. If you measure from one side’s print to the next print made by the same foot, you are measuring a step pattern that may help show how the animal moved. Use a simple sketch to label each print rather than trying to remember the pattern later.
You can also measure the trackway’s width. Look at the space between the left and right sets of prints. A narrow trackway may show that the animal placed its feet close to a center line. A wider trackway may show a different body shape, movement style, or surface effect. Do not use width alone to identify an animal. Compare it with toe count, pad shape, print size, and the repeated pattern.
Depth can add another clue, but treat it carefully. A deep print does not automatically mean a heavy animal. Soft mud, a downhill slope, or one foot landing harder can create extra depth. Compare prints on the same patch of ground. Note whether the mud stayed firm around the edges or crumbled inward. Write descriptions such as “deepest at the heel” or “front edge collapsed,” because those details explain why the measurement may be uncertain.
Mud often hides the difference between a paw and a hoof. A hoof print may show a split shape, while a paw print may show separate toes and a central pad. However, mud can fill gaps or join separate marks. Use a twig to point at features from the side, but do not dig into the print. If you need a closer look, photograph the mark from low down with light coming from the side. Side lighting can make shallow ridges and toe marks easier to see.
A useful field record can include:
• Track length and width
• Number of visible toes or hoof sections
• Claw marks, if present
• Distance between repeated prints
• Surface condition and track depth
• Direction of travel
• A sketch and photographs
When you finish measuring, compare the prints instead of rushing to a species name. Suppose three mud tracks measure nearly the same length and show four toe marks, but the front edges look different. The animal may have stepped at different angles, or the mud may have changed. Look for the features that repeat across the set. Repeated features make stronger clues than one strange mark.
Use a scale in every photograph whenever possible. A ruler works well but keep it outside the print. Photograph straight down for shape and from a low angle for depth. Avoid casting a shadow across the track. If you cannot avoid the shadow, take another photograph from the opposite side. Label each picture in your notebook so you can match it to the correct measurement later.
When the mud holds a deep, strong-edged track, an adult may help you make a cast. A cast is a solid copy of the track. Casting can preserve details for later comparison, but it uses material and may disturb the site, so photograph and measure first. Never cast tracks in protected areas without permission. Do not pour material into a track that contains water, living creatures, or delicate plants.
Snow and sand need the same careful method, with a few extra checks. In snow, watch for melting around the edges and wind-blown crystals filling the print. In sand, watch for wind smoothing the toes and loose grains sliding into the center. Measure before the surface changes, and record the condition beside your numbers. A track measured as “12 centimeters long in damp, firm sand” tells more than “12 centimeters.”
Finish your field note with a confidence check. Mark each clue as clear, partly clear, or missing. For example, the length may be clear, toe count partly clear, and claw marks missing. This prevents a guess from sounding like a fact. Good wildlife investigation does not require perfect certainty. It requires careful observations that another person could examine and understand.
Before leaving, take one last photograph, remove only the markers you brought, and avoid walking through the trackway. Review your notes while the scene remains fresh. You protected the evidence, measured more than one print, and separated observations from guesses. The ground may look quiet, but its marks hold a record - if you learn to read them before weather and footsteps erase the message.
End of chapter one. 3 more chapters in the full book.
Swipe or use the arrows to turn the page
What's inside: 4 chapters
- 1. Reading the Ground: How to spot, preserve, and measure animal tracks in mud, sand, or snow.
- 2. The Crumb Trail: How to identify what animals ate by analyzing pinecone scraps, cracked nuts, and chewed leaves.
- 3. Homes and Hideouts: How to find secret entryways, tree hollows, and underground burrows without disturbing the residents.
- 4. Wildlife Stakeouts: How to build a simple camouflage blind, stay perfectly still, and safely observe local fauna.
About this book
"Nature Clues For Young Biologists" is a how-to guide book by Sadia naveed with 4 chapters and approximately 6,587 words. Kids learn wildlife forensics using tracks, scraps, and habitats.
This book was created using Inkfluence AI, an AI-powered book generation platform that helps authors write, design, and publish complete books. It was made with the AI Ebook Generator.
Frequently Asked Questions
What is "Nature Clues For Young Biologists" about?
Kids learn wildlife forensics using tracks, scraps, and habitats
How many chapters are in "Nature Clues For Young Biologists"?
The book contains 4 chapters and approximately 6,587 words. Topics covered include Reading the Ground: How to spot, preserve, and measure animal tracks in mud, sand, or snow., The Crumb Trail: How to identify what animals ate by analyzing pinecone scraps, cracked nuts, and chewed leaves., Homes and Hideouts: How to find secret entryways, tree hollows, and underground burrows without disturbing the residents., Wildlife Stakeouts: How to build a simple camouflage blind, stay perfectly still, and safely observe local fauna..
Who wrote "Nature Clues For Young Biologists"?
This book was written by Sadia naveed and created using Inkfluence AI, an AI book generation platform that helps authors write, design, and publish books.
How can I create a similar how-to guide book?
You can create your own how-to guide book using Inkfluence AI. Describe your idea, choose your style, and the AI writes the full book for you. It's free to start.
Write your own how-to guide book with AI
Describe your idea and Inkfluence writes the whole thing. Free to start.
Start writingCreated with Inkfluence AI


