

Read the first chapter
The whole of chapter one, free. About 15 min. Turn the pages with the arrows, your keyboard, or a swipe.
Chapter 1
Benefits Binder System Setup
A renewal notice arrives while your kitchen table already holds a utility bill, a medical statement, school papers, and an unopened letter from an agency. You know the household applied for help before, but you cannot remember the submission date, the case number, the password, or which document you uploaded. You search through email, phone photos, and drawers until the deadline feels dangerously close.
The Benefits Binder System (BBS) prevents that scramble. It gives every household one dependable place to store program information, copies of documents, application records, deadlines, and follow-up notes. The system does not guarantee eligibility, approval, payment, or continued assistance. It simply helps you present accurate information, respond on time, and find your own records when you need them.
Rules, funding, program names, and eligibility requirements may change. Treat the BBS as an organized record of what your household submitted and learned - not as proof that a program still operates the same way. Check current instructions each time you apply or renew.
Choosing a Binder That Fits Your Household
Start with a physical three-ring binder that can hold expanding records. Choose a size that fits your household’s needs rather than buying the smallest binder available. A household applying for one program may need only a modest binder. A household managing food, rent, healthcare, utilities, childcare, and tax records may need a larger binder or a second binder for older closed cases.
Use dividers with large labels. Keep labels simple enough to read quickly:
• Household Profile - Identity and Household Records - Income and Resources - Housing - Utilities and Communications - Healthcare - Applications - Agency Contacts - Deadlines and Renewals - Closed Records
Place a clear pocket at the front for urgent papers. Use it for a notice with a response date, an appointment letter, or a document you must submit soon. Do not use the front pocket as a permanent storage area. Review it at least once a week and move each paper to its proper section after you act on it.
Add a pencil pouch or envelope for small items such as stamps, index cards, and a flash drive. Do not store original birth certificates, Social Security cards, passports, or other irreplaceable records in the binder. Keep originals in a secure location and place copies in the binder. If an agency requires an original, record when you sent it, how you sent it, and when you expect it back.
A digital folder should support the binder, not replace it unless your household can reliably access and back up digital files. Create one main folder named “Benefits Records” and use the same section names as the binder. This matching structure reduces confusion. If you store a paper application under “Applications,” save its digital copy in the digital Applications folder.
Use a file name that tells you what the document is without opening it. A useful format includes the date, document type, and program or agency:
2026-09-01_income_statement_utility-assistance.pdf
Avoid names such as scan001.pdf, newphoto.jpg, or important.pdf. Those names force you to open files one at a time and make mistakes more likely when you need a document quickly.
Protect digital records with a strong password, device updates, and a backup. Avoid saving sensitive documents on a shared public computer. Before uploading a document to an agency portal, confirm that you use the official website or app. A neat file system cannot protect you from a fake website.
Ask yourself: Could another adult in the household find the current application, the latest notice, and the next deadline within five minutes? If the answer is no, adjust the binder before adding more records.
Your practical takeaway: choose one physical home and one digital home for benefits records, then use matching labels in both places.
Building the Household Eligibility Profile
The Household Eligibility Profile gives you a consistent snapshot of the information programs commonly ask about. It does not determine eligibility. Agencies apply their own rules, definitions, income calculations, household rules, and verification standards. The profile helps you answer questions consistently and notice when information changes.
Place the profile near the front of the binder. Use a fresh copy whenever a major household change occurs, such as a move, marriage, separation, birth, death, job change, disability determination, change in school enrollment, or change in immigration or citizenship documentation. Store the old copy in Closed Records or behind a dated “Previous Profiles” divider. Keeping older versions helps you understand what information you used on an earlier application.
Include the following information:
• Each household member’s full legal name - Preferred name, if different - Date of birth - Relationship to other household members - Current address and mailing address - Phone numbers and email addresses - Preferred language and communication needs - Employer, school, or training information when relevant - Health, disability, caregiving, or veteran status when a program asks about it - Monthly income sources and payment frequency - Major recurring expenses - Current benefits, case numbers, and renewal dates - Safe contact details for agency communication
Record income by source instead of combining everything into one unclear number. Separate wages, self-employment income, unemployment payments, retirement income, child support, alimony, disability payments, and other regular payments. Write down whether each amount reflects gross income, take-home pay, or another figure. If a form asks for gross income, do not substitute the amount deposited into the bank account.
Record payment frequency beside each source. For example, write “paid every two weeks” or “paid on the first of each month.” A monthly figure can look different depending on how a program converts weekly, biweekly, or irregular income. Let the agency’s instructions control the calculation.
Track household changes in a short change log. Write the date, what changed, and which programs or agencies may need an update. For example:
2026-09-01 - Employer reduced work hours - check active applications and reporting duties.
This note does not replace reporting a change. It reminds you to check the instructions for each active program and contact the right agency when required.
Keep case numbers on the profile only when you can store them safely. A case number may help an agency locate your record, but it can still be sensitive information. Do not post it publicly, send it through an unverified social-media message, or leave it visible in a shared workspace.
For children or adults who receive services separately, note the responsible agency and authorized contact. One household member may have a healthcare case with one office, a housing application with another, and a utility discount with a provider. The profile helps you see the full picture without assuming that one agency can answer for another.
Pause after completing the profile and compare it with your most recent official records. Check names, dates of birth, address spelling, and contact information. A small error can cause notices to go to the wrong place or force you to explain conflicting information later.
Your practical takeaway: keep one dated household snapshot, update it after major changes, and separate each income source clearly.
Creating the Application Record
Every application needs its own record. Do not rely on a confirmation screen, memory, or a single email. Portals can time out, messages can disappear, and agencies may use different case numbers for different programs.
Create an Application Record immediately before you submit, or as soon as you begin an application that you expect to finish. Give the record a short title that includes the program and the year. Then record:
• Program or service name - Agency or organization handling the application - Official website, office address, or application method - Date you started - Date you submitted - Submission method - Confirmation number or case number - Household members included - Documents submitted - Documents still requested - Assigned worker or office, if provided - Expected next contact, if the agency gives one - Date you followed up - Current status - Date of the latest notice
The submission method matters. Write “online portal,” “mail,” “drop box,” “in person,” or another accurate description. If you mailed an application, keep a copy of the mailing receipt and note the tracking number. If you used a drop box, record the date and location. If you submitted online, save the confirmation page as a PDF or print it. Take a screenshot only as an extra copy; a screenshot may not show the full confirmation details.
Store copies of the exact forms you submitted. Include attachments and uploaded documents when possible. If the portal does not let you download a completed form, print the review screen or save screenshots that show the questions and your answers. Add a note explaining what you could not save.
Use a document cover sheet for each application. Place it on top of the application packet and list every item behind it. For example:
• Completed application - Identity document copy - Income records - Housing cost record - Agency notice - Submission confirmation - Follow-up notes
Mark each item as “submitted,” “requested,” “received,” or “not applicable.” This simple status word prevents you from sending the same document repeatedly or assuming that the agency received something you only prepared.
Do not change a document after submission without preserving the original. If you discover an error, save the submitted version, write down the problem, and follow the agency’s correction instructions. Keep the corrected version separate and label it with the date you sent it. This record shows which version the agency received at each point.
When an agency asks for more information, place the request in the Application Record and record the response deadline. Save the document you send and proof of delivery. If you cannot provide the requested item, write down the reason and ask the agency what substitute proof it accepts. Do not ignore the request because the document seems difficult to obtain.
Track status using plain terms such as “draft,” “submitted,” “additional information requested,” “approved,” “denied,” “closed,” or “waiting for agency action.” Avoid writing “probably approved” or “should be fine.” Those phrases express hope, not a verified status.
A completed application record should let you answer five questions without searching through multiple places: What did we request? When did we submit it? What did we send? What does the agency still need? What happens next?
Your practical takeaway: create one complete record for each application and preserve the exact version you submitted.
Using Trackers for Deadlines and Follow-Up
The BBS uses separate trackers because different dates mean different things. A submission date shows when you sent an application. A response deadline shows when the agency expects something from you. A follow-up date tells you when to check for movement. A renewal date marks a future action. Combining all dates in one messy list makes missed actions more likely.
Keep a Deadline Tracker near the front of the binder. Use one line for each important date and include:
• Program or agency - Required action - Due date - Date you completed the action - Proof location - Result or next step
Write the action in a way that tells you what to do. “Healthcare” does not help enough. “Upload income statement to healthcare portal” gives you a clear task. “Agency letter” does not help enough. “Respond to request for household signature” tells you what the letter requires.
Use a calendar as a second reminder, but do not let the calendar replace the tracker. Put the deadline on the calendar and keep the supporting notice in the binder. If a date changes, cross out the old date with one line, write the new date, and explain the change. Never erase a date that may matter later.
Set reminders before the actual deadline. Choose a reminder that gives you enough time to locate a document, correct a mistake, or contact the agency. A reminder on the due date may leave no time to solve a problem. The correct lead time depends on the task. A short online upload may need less preparation than a form that requires a landlord, employer, doctor, or school official to complete a section.
Create a Renewal Calendar only for known renewal or review dates. Do not assume every program renews at the same time or continues automatically. Record the date shown on an official notice or the date an agency confirms. If no date appears, write “not provided” and add a follow-up task to ask the agency.
Keep a Follow-Up Tracker for actions that do not have a formal deadline. Record the date, agency, method, person or office contacted, question, answer, and next step. If the agency says it will send a notice, record that statement and check whether the notice arrives. If the agency gives verbal information that affects an application, ask how you can confirm it in writing.
Review active dates during a weekly binder check. Start with the front pocket, then scan the Deadline Tracker, Renewal Calendar, and Application Records. Remove completed tasks only after you record the completion date and proof location. Keep the line visible if the matter remains active.
A quick comprehension check helps: if you look at a date and cannot explain what action it requires, rewrite the entry. A date without an action is only a warning, not a plan.
Your practical takeaway: record every important date with a specific action, proof of completion, and the next step.
Keeping Records Searchable Year After Year
Organization fails when it depends on perfect memory. The BBS uses consistent names, dates, and locations so you can find records even months later.
Date every paper you receive and every note you create. If a notice already shows a date, use that date in the file name and write the date you received it on the first page. The receipt date can matter when mail arrives late or when an agency asks when you learned about a decision.
Store records in three broad groups: active, completed, and closed. Active records require action or may still affect the household. Completed records show a finished task but may support another task later. Closed records belong to applications or cases that ended. Do not throw away a closed record simply because the case ended; first consider whether the notice, approval, payment history, or correspondence may matter for taxes, future applications, or a review.
Use colored tabs only as a visual aid. Do not depend on color alone because ink fades, lighting varies, and another household member may not know your color system. Write the program name and status on the tab.
Keep a master index at the front. The index should list the record name, date range, and location. For a digital file, include the folder path. For a paper file, include the divider and page range if you number pages. Update the index whenever you add a new active application or move a record to Closed Records.
Numbering pages can help with large packets. Write the page number in a corner and record the total number of pages on the cover sheet. If you send a packet, note how many pages you sent. This practice helps you identify a missing page when an agency says the submission was incomplete.
Scan or copy important records before sending them. Check that every page is readable, including the corners and small print. Open each digital file after saving it. A file that will not open or shows a blank image does not count as a usable copy.
Limit duplicate copies. Keep one primary copy in the correct section and note other locations when necessary. Too many copies create conflicting versions. If you replace a document, mark the old one “superseded” and write the date of replacement rather than quietly mixing old and new records.
Review access and privacy every month. Remove documents that you no longer need under your household’s safe recordkeeping plan, but do not discard records blindly. Shred papers that contain Social Security numbers, financial account details, medical information, or other personal data. Delete digital files securely when appropriate and empty the device’s trash folder.
Share the binder’s location and basic system with a trusted household member. That person should know where to find urgent notices and how to identify active applications. Do not share passwords or sensitive identity information casually. Give access only to people who need it and can protect it.
The BBS works when it becomes a small household routine: file new papers, save digital copies, update dates, and close completed tasks. It does not require perfect paperwork. It requires a repeatable place for each record.
Your practical takeaway: use consistent names, a master index, dated versions, and clear active or closed sections so records remain useful after the immediate crisis passes.
Check These First
Before you begin an application or add more papers, check the binder’s basic structure.
• Choose the physical binder’s location. - Create matching digital folders if you use digital records. - Add dividers for the household profile, applications, contacts, deadlines, and closed records. - Place a master index at the front. - Create a dated Household Eligibility Profile. - Create a Deadline Tracker and Renewal Calendar. - Prepare one blank Application Record and one document cover sheet. - Set a weekly reminder for a short binder check. - Choose a secure backup method for digital files. - Confirm that trusted household members know where urgent notices belong.
Documents to Gather
Gather copies, not originals, unless an agency specifically instructs you otherwise. Keep documents readable and label each copy with the household member’s name and the document date.
• Identification records - Address and mailing records - Income records by source - Benefit or case notices - Housing records - Utility or service bills - School, employment, or caregiving records when relevant - Medical or disability records when an agency requests them - Submission confirmations - Agency letters and emails - Mailing receipts or upload confirmations - A list of current case numbers and renewal dates
Do not gather documents randomly. Match each document to an application or profile section so you know why you keep it.
Questions to Ask
Ask these questions when you set up the system or receive a new notice:
• Where will we store the original? - Where will we store the copy? - Which household member does this document concern? - Which program or agency requested it? - What date controls our next action? - How will we prove that we submitted it? - Does the agency require a specific file type, form, signature, or delivery method? - What should we do if the document does not arrive before the deadline? - When should we check the application status? - When should we move this record to Closed Records?
Red Flags
Watch for recordkeeping problems that can cause avoidable delays:
• A deadline appears on a notice but not on your tracker. - You cannot identify which application a document belongs to. - You saved a file as “scan001” and cannot recognize it later. - You sent an original without keeping a copy or delivery proof. - You rely on a portal confirmation that you did not save. - Two versions of the same form have different answers. - A case number appears in an unsecured public post. - A household profile contains outdated income, address, or contact information. - You assume a program continues because it helped the household before. - You treat a binder entry as proof of approval when the agency has not issued an official decision.
Rules, funding, names, and eligibility may change. Verify current requirements with the responsible agency before relying on an old form, notice, website instruction, or saved deadline.
Your Next Action
Set up the binder today with dividers, a master index, a Household Eligibility Profile, an Application Record, and the three date tools: Deadline Tracker, Renewal Calendar, and Follow-Up Tracker. Then choose one current household paper - an application, notice, or bill - and file it correctly from start to finish. Save a copy, record its date, identify the next action, and place that action on your calendar.
The first organized record gives the rest of the system a place to grow. Over time, the BBS turns scattered papers into a searchable household history - one that helps you act on current opportunities without losing track of what you already submitted.
End of chapter one. 24 more chapters in the full book.
Swipe or use the arrows to turn the page


What's inside: 25 chapters
- 1. Benefits Binder System Setup
- 2. The Benefits Nobody Checks First
- 3. Money-Saving Discovery Callouts
- 4. How to Search Official Resources
- 5. When One Program Opens Another
- 6. Waiting Lists, Deadlines, Timing
- 7. The Documents That Make Applications Easier
- 8. How Renewals and Recertifications Work
- 9. What to Do When You Are Denied
- 10. Appeals Checklist and Evidence Pack
- 11. How to Talk to Agencies Without Losing Track
- 12. Grant Scams and Fake Government Money
- 13. Phishing, Identity Theft, and Gift-Card Traps
- 14. The Difference Between Grant and Voucher
- 15. Help With Food: SNAP and Beyond
- 16. Help Paying Rent: ERAP and Protections
- 17. Help Buying a Home: Down Payments
- 18. Help Fixing a Home: Repairs and Weatherization
- 19. Help With Utilities: Bills, Phone, and Internet
- 20. Help With Heating: Weather and Emergency Options
- 21. Help With Healthcare: Coverage and Cost Sharing
- 22. Help With Prescription Costs: Copays and Programs
- 23. Help With Childcare: Subsidies and Waitlists
- 24. Tax Credits and Refund Opportunities
- 25. Your Once-a-Year Benefits Review
About this book
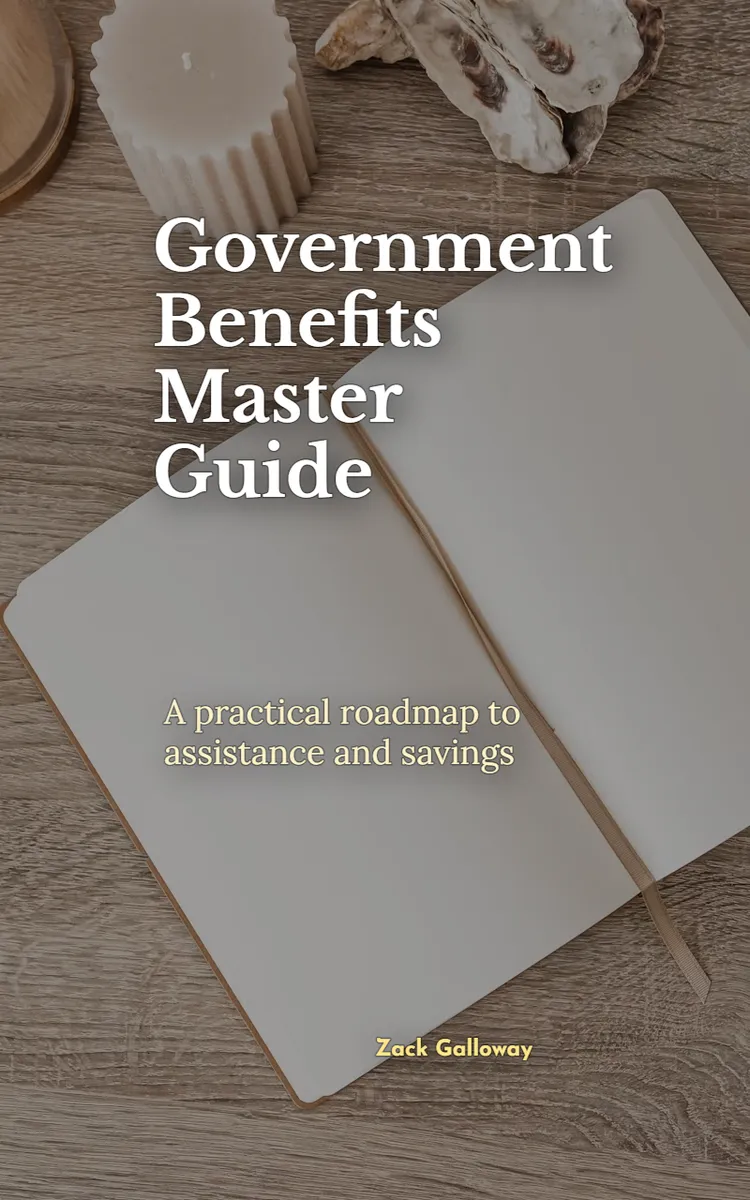
"Government Benefits Master Guide" is a how-to guide book by Zack Galloway with 25 chapters and approximately 81,689 words. Finding and applying for government and nonprofit benefits.
This book was created using Inkfluence AI, an AI-powered book generation platform that helps authors write, design, and publish complete books. It was made with the AI Ebook Generator.
Frequently Asked Questions
What is "Government Benefits Master Guide" about?
Finding and applying for government and nonprofit benefits
How many chapters are in "Government Benefits Master Guide"?
The book contains 25 chapters and approximately 81,689 words. Topics covered include Benefits Binder System Setup, The Benefits Nobody Checks First, Money-Saving Discovery Callouts, How to Search Official Resources, and more.
Who wrote "Government Benefits Master Guide"?
This book was written by Zack Galloway and created using Inkfluence AI, an AI book generation platform that helps authors write, design, and publish books.
How can I create a similar how-to guide book?
You can create your own how-to guide book using Inkfluence AI. Describe your idea, choose your style, and the AI writes the full book for you. It's free to start.
Write your own how-to guide book with AI
Describe your idea and Inkfluence writes the whole thing. Free to start.
Start writingCreated with Inkfluence AI


